Drainage Management and Inspection
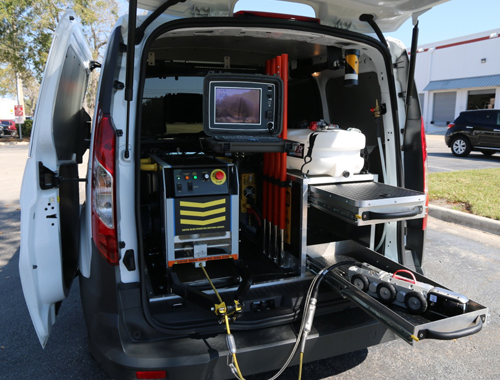
IMET manage the drainage and inspection by using hi-technology machine which can provide the easiest and fastest way of cleaning pipelines. Cleaning and inspection can be done simultaneously, which can save time and money. The timetable for cleaning and inspection depends on the location and status of pipeline.
How we clean?
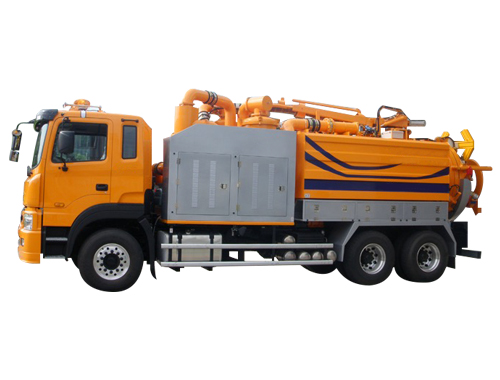
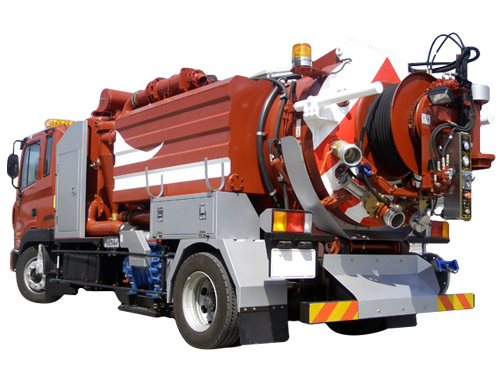
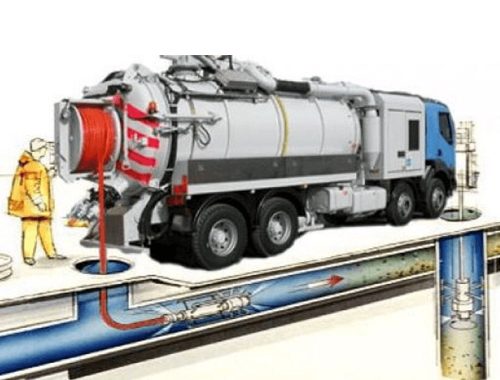
Dredging
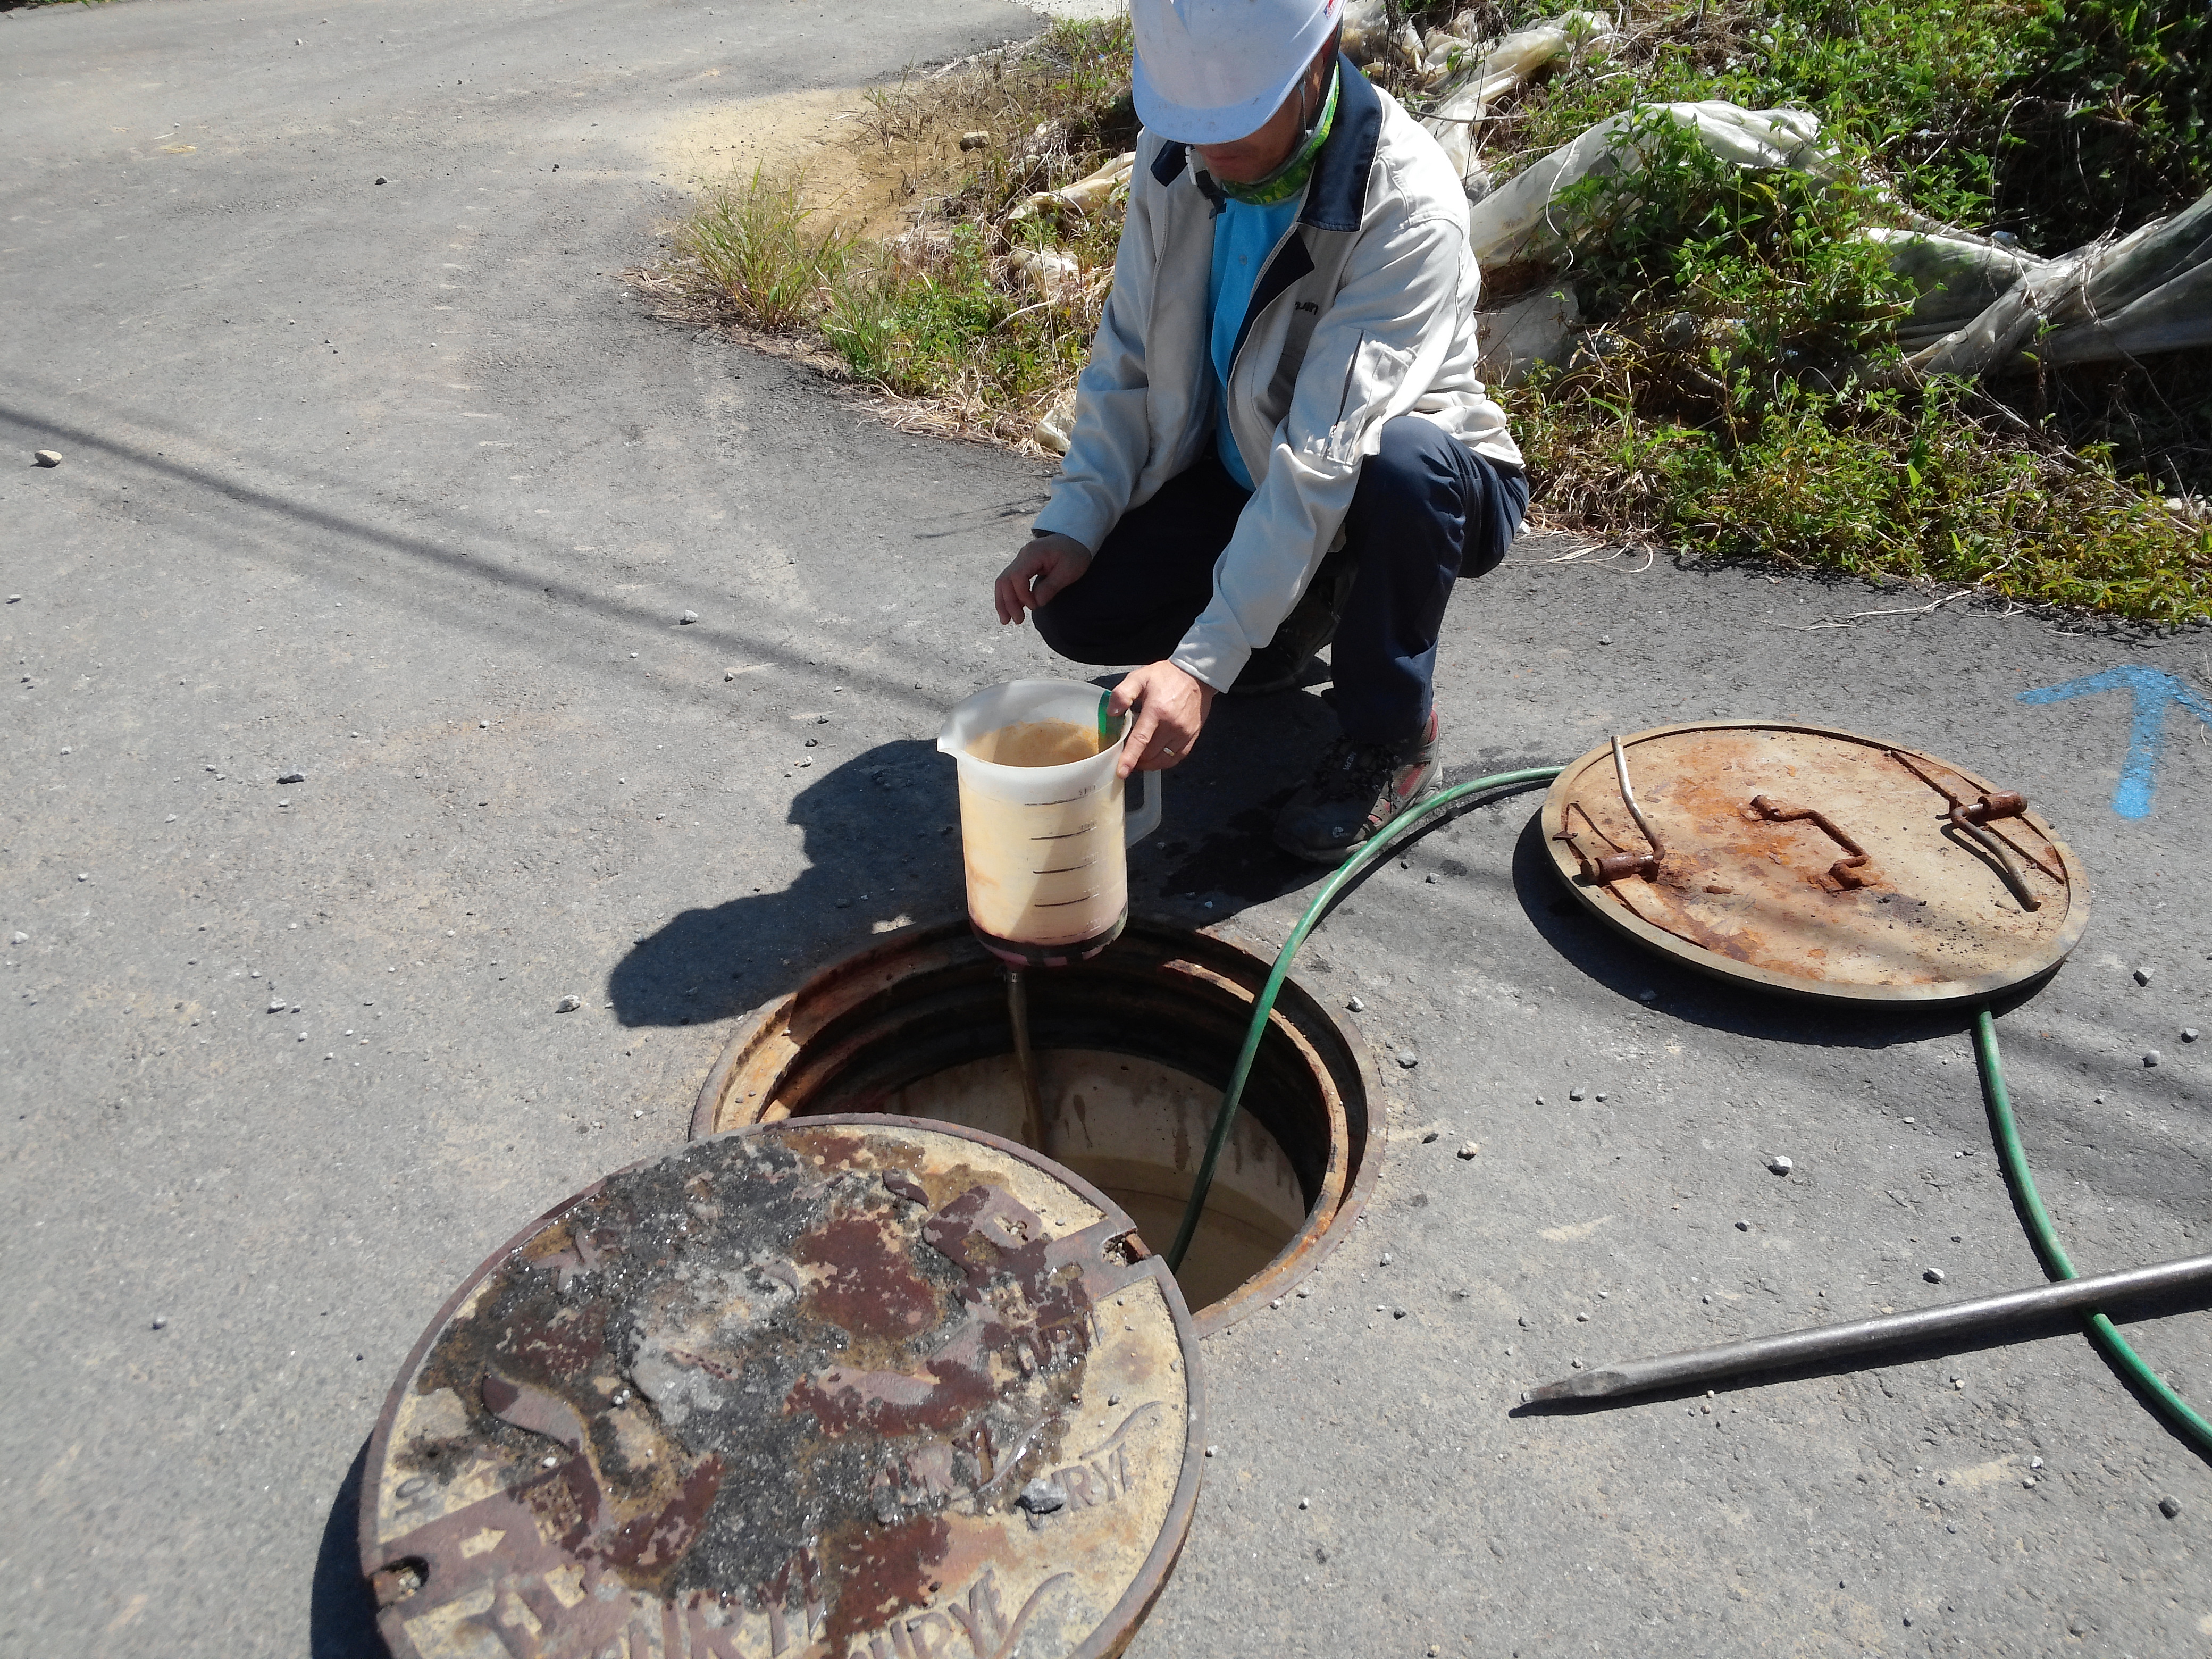
It is a cleaning operation using high pressure Jet-Cleaning equipments and high vacuum suction vehicle. All the wastes and sludges(sand, pebbles and other matter) are pushed by high pressure water that is discharged from high pressure jet-cleaning equipment then these wastes are sucked into suction hose of vacuum car that is attached to manhole, making dredging completely.
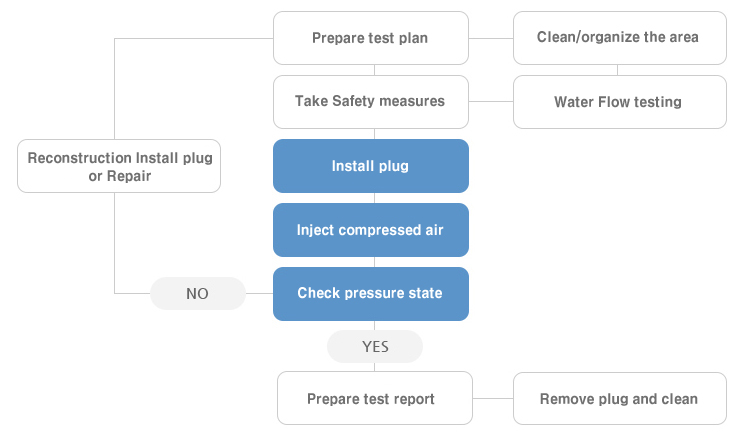
Operation flow of dredging
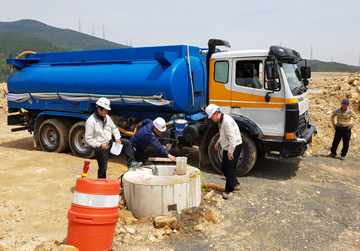
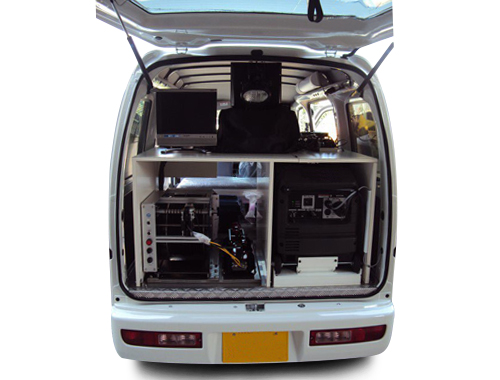
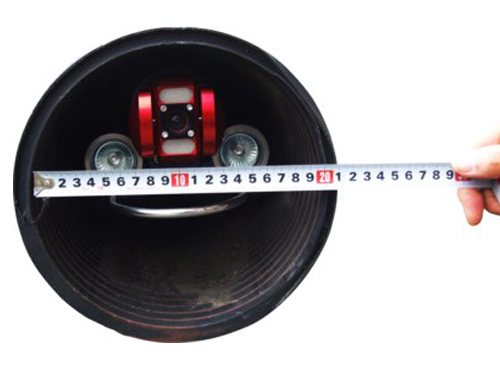
Operation Trucks and Inspections
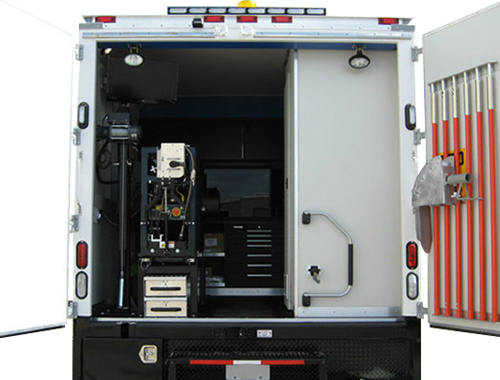
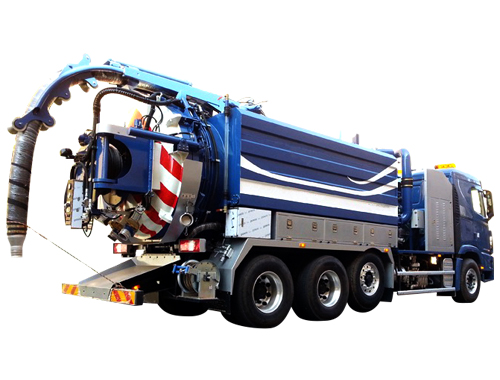
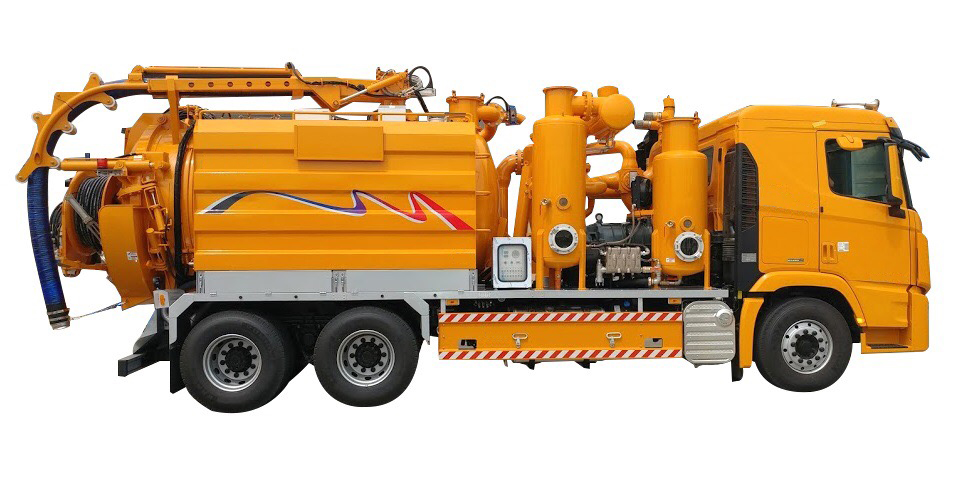
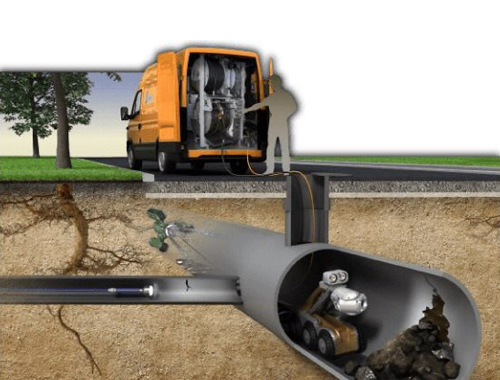


Sewage dredging – Jet cleaning technology
It uses high pressure spray jet cleaner equipment vehicle or vacuum suction vehicle. The various deposits accumulated in the sewer pipe are removed by the jet nozzles which are independently propelled by the high pressure water discharged from the high pressure jet cleaner equipment; and are pushed out to the reverse direction so that the suction hoses of the vacuum suction car installed in the manhole are automatically processed. It is the best dredging method by the high-pressure spray type jet cleaning method which completely removes various sediments.

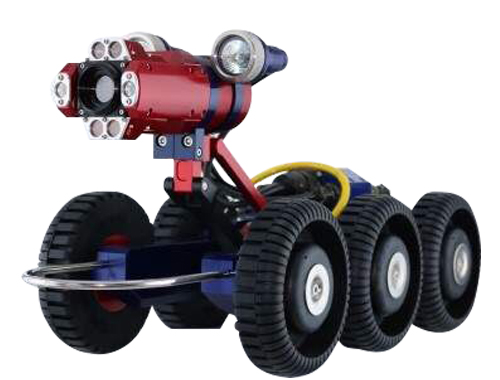
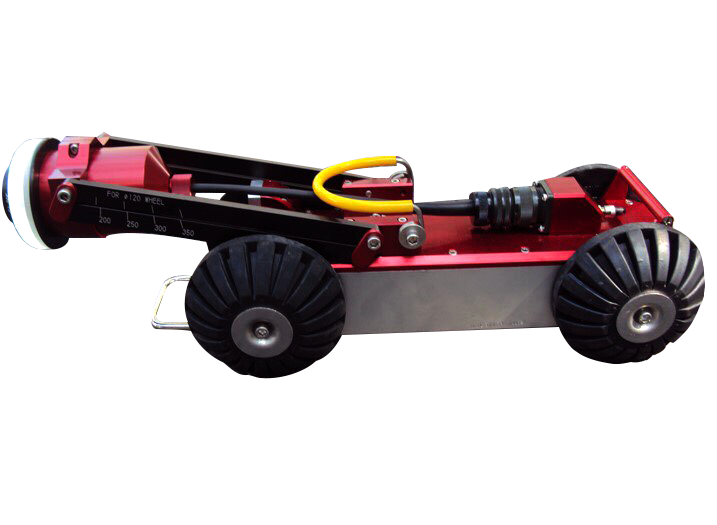
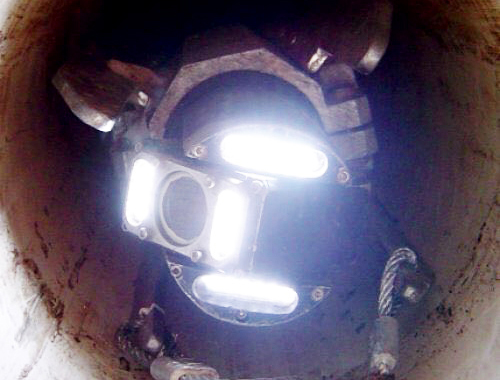
How we inpect?
Inspection can be done before and after the cleaning process. It has 3 types of testing namely Smoke, Pneumatic Press and Watertight Test
Smoke Test
A fast way to find the location of inflow in a conduit facility at low cost. Inflow can occur in roof gutter, water fountain, building drainage, incorrect connection of conduit, etc. It can be identified by smoke test.
Smoke test procedure
Step 1
Observe closely traffic condition of the surrounding area(e.g. manhole), wind direction, etc.
Step 2
Install ground water plug in the main pipe of the manhole bottom and block by air injection. (supporting wood must be installed)
Step 3
Block the entrance of the manhole bottom with a sealing cover and inject air in the ground water plug.
Step 4
Block the entrance of the manhole top with a sealing cover, inject air in the ground water plug and connect the body part with flexible hose.
Step 5
Hold the chalk with the tweezers. After ignition, fix the chalk to the part designated for chalk on the device body and turn the blowing switch on.
Step 6
Press the blowing button firmly.
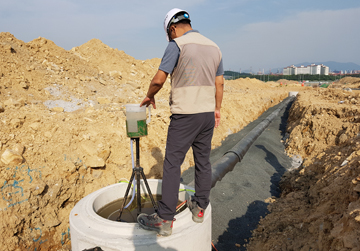
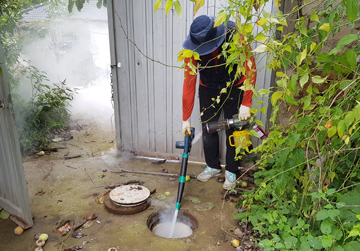
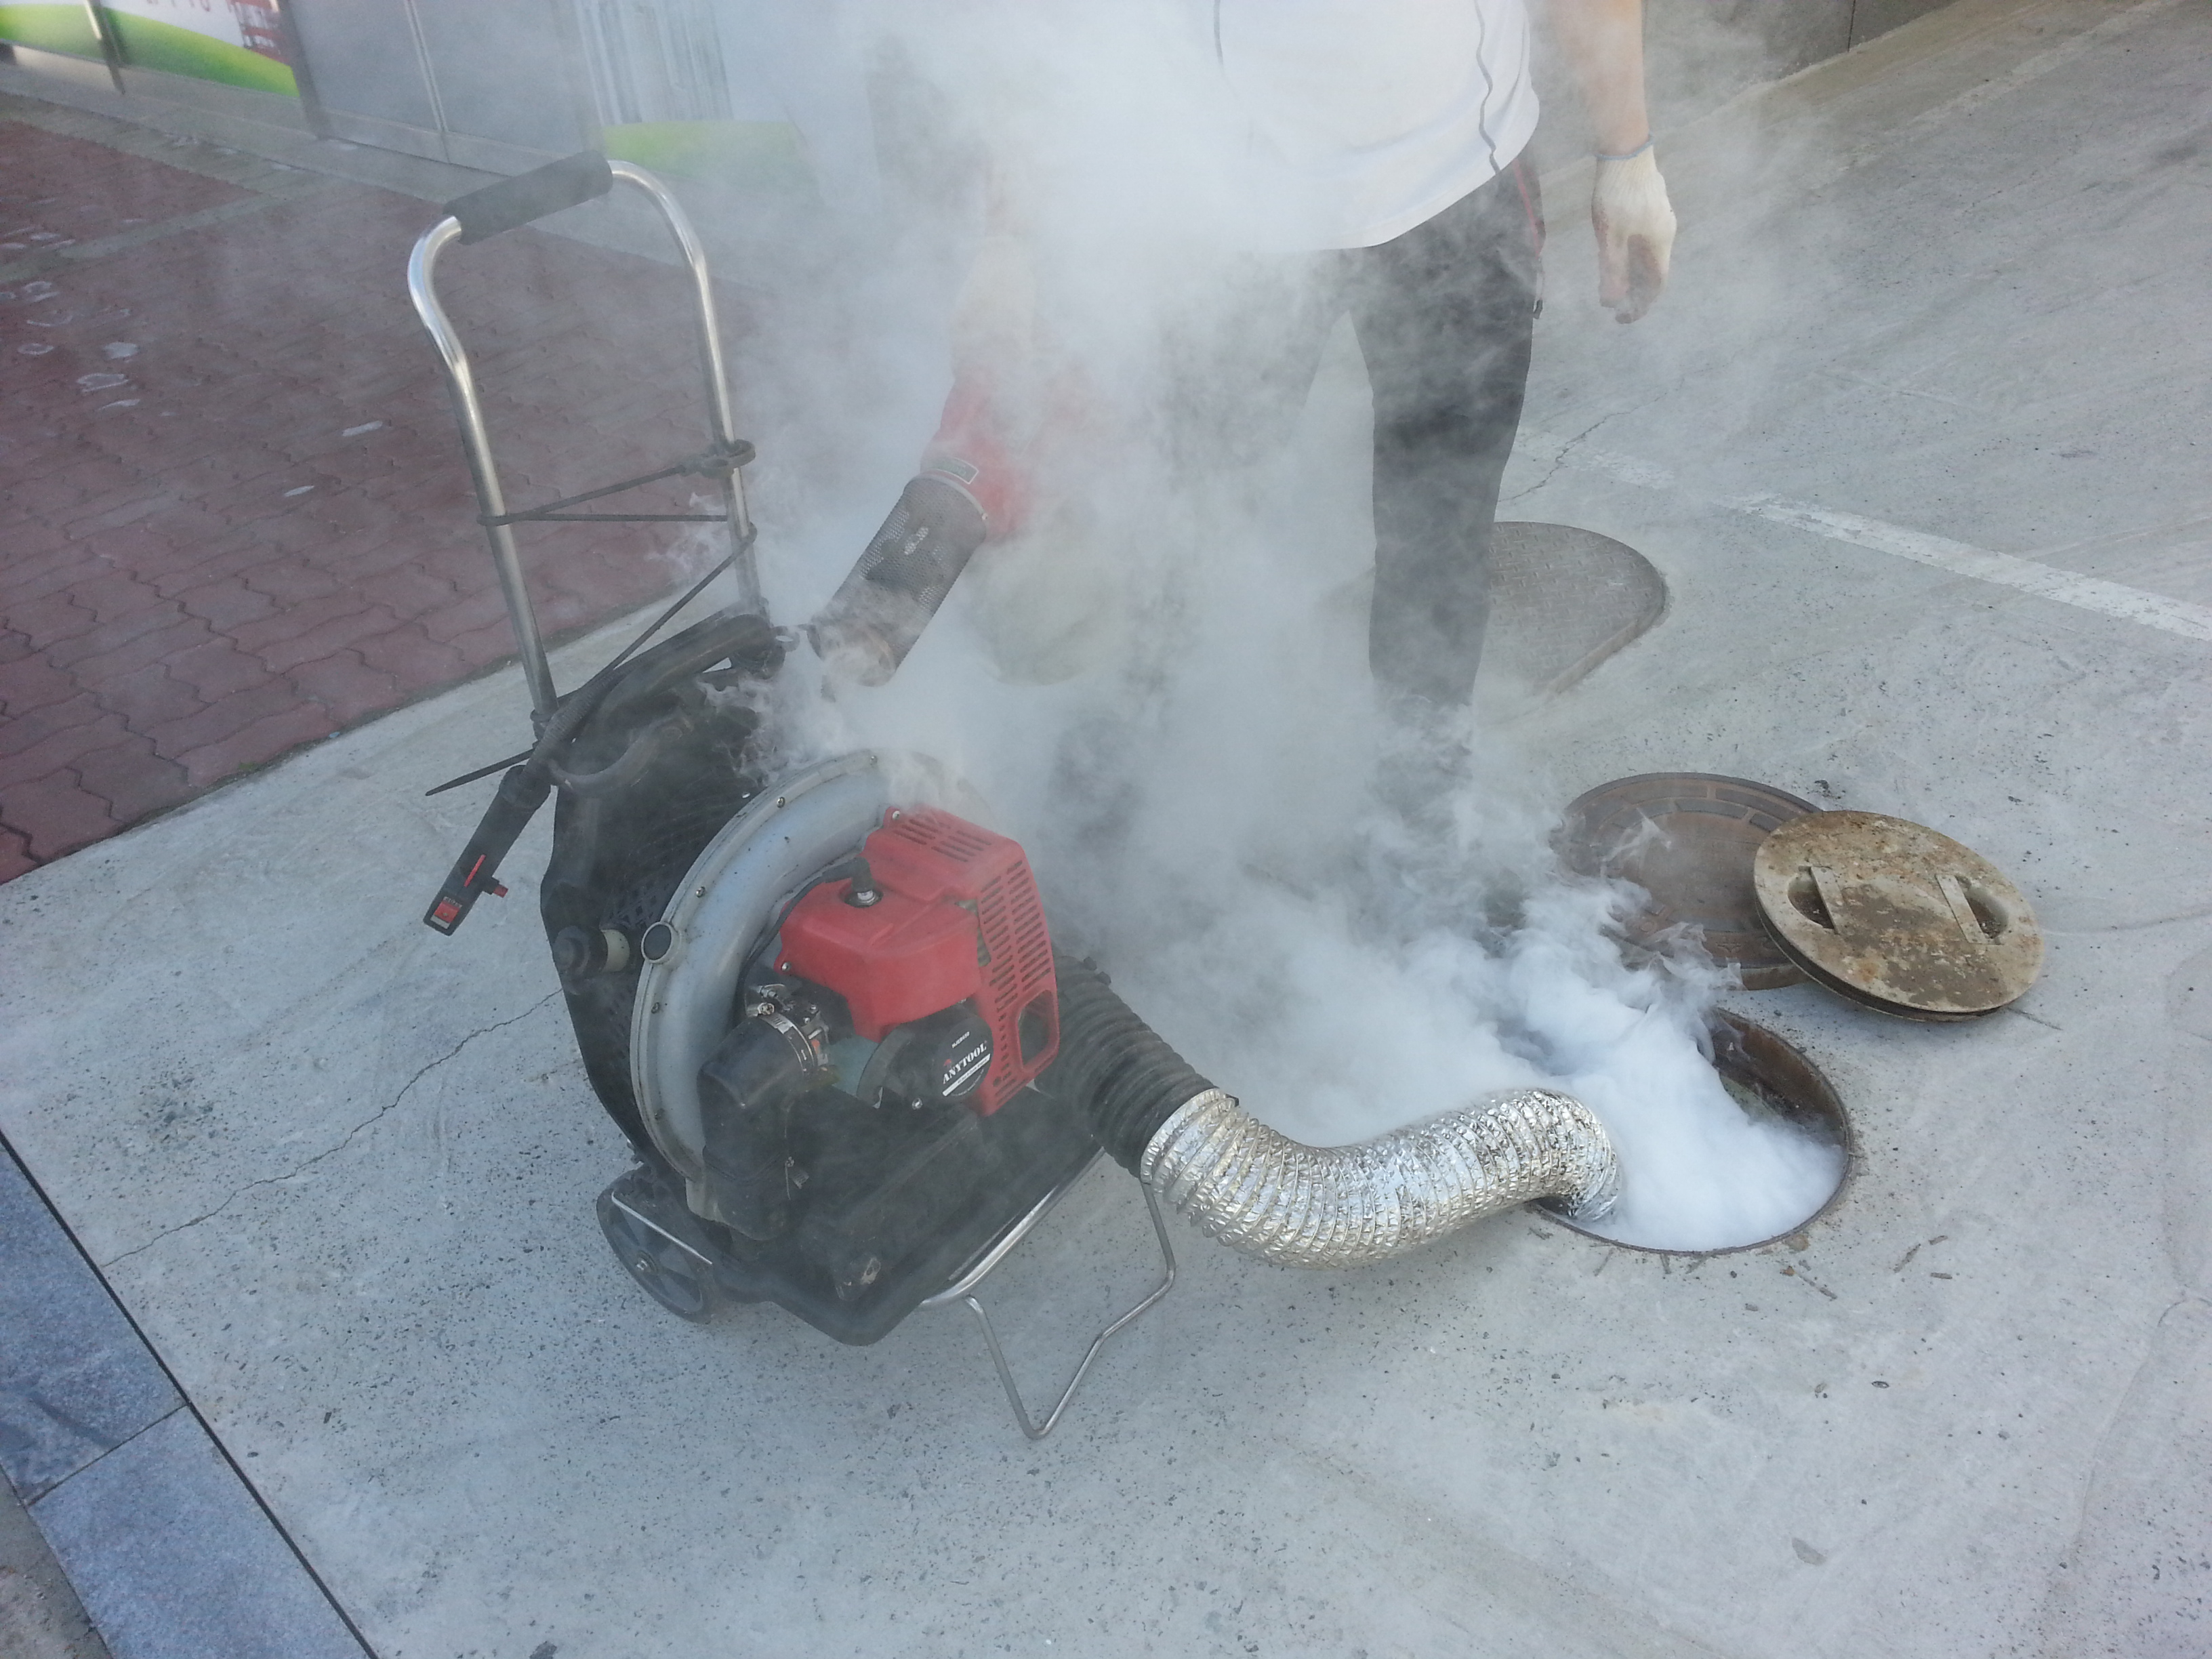
Smoke test inspection

Main facilities for smoke test
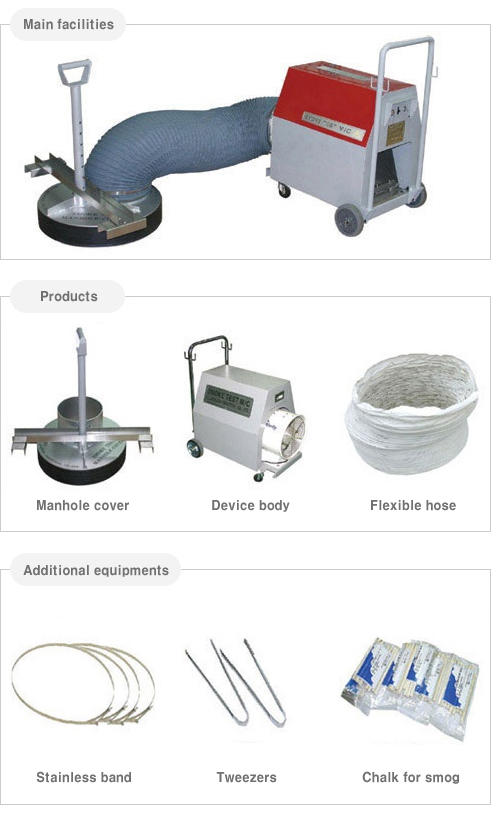
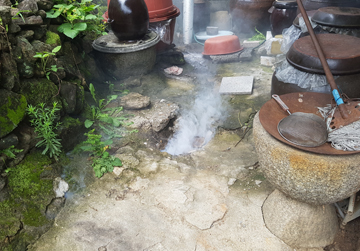
Smoke demonstration
Pneumatic Pressure Test
Supplements shortcomings of the existing watertight test and effectively inspects drainage pipe leak. It is fast, accurate and economical way to check piping and construction after construction of new or existing buildings and repair. This simple and easy test can save inspection time and the test is available regardless of the ground water level. It accurately identifies the location of leak as well as performs partial pneumatic pressure test for possible leak area.
Test procedure
Pneumatic pressure test inspection

1. Pneumatic pressure test is to inspect the span of conduit and watertightness of the connections through air pressure. Manholes are excluded from the test due to possible damage.
2. Conduit test, due to the difference in nature of water and air even at the same pressure, can view pneumatic pressure test and hydraulic test results equally and pneumatic pressure test can be considerably affected by the conduit air gap, water content and pipe thickness.
3. Even for conduit facilities whose watertightness is confirmed, certain amount of air loss is unavoidable when applying pneumatic pressure. Therefore when performing low pressure air test on sewage conduit, air loss according to pipe type, pipe damage part and connection defect should be divided.
4. Pneumatic pressure test methods include constant pressure method and time pressure method; and time pressure method applies to sewage conduit watertight test.
5. For pneumatic test for newly constructed conduit, LC and LD methods are used according to pipe diameter, pressure(Po), acceptable decompression amount(△Po); for the existing conduit, the methods are divided according to the pipe diameter. However consult with the buyer regarding application before performing test.
1) The first initial pressurization should be 10% more than that of each inspected pressure during the preliminary pressurizing time. (e.g. Initial pressurization of LB: 5*1.1=5.5kPa)
2) After preliminary pressurization, it is actual measuring stage and decompression amount(△P) measured continuously during the measuring time(t) according to each test method is compared to the acceptable decompression amount(△Po) to determine PASS or FAIL.
3) It is considered PASS if the measured decompression amount(△P) is smaller than the acceptable decompression amount(△Po).
4) Test standards, inspected pressure(Po), acceptable decompression amount(△Po) and measuring time(t) are the same as for the test acceptable amount according to pipe diameter
6. For larger conduits(over 1000mm), test mainly on the connections and prepare the test report.
7. When applying compressed air test methods, please be aware of the followings.
1) Conduit’s wetting state, pipe type and pipe diameter should be considered when the inspection method is discussed with the buyer.
2) Ground water plug should be kept confidential for construction. In the testing area, the air pressure should not be dropped to the level of atmospheric pressure.
3) For safety, access to the manhole should be restricted during the test and the test instrument should have decompression device.
Watertight Test
Sewage conduit is installed underground and may cause lack of attention due to site renovation, etc. Therefore, perfect construction is required to prevent weak construction, ground water pollution and water pollution in the public basin.
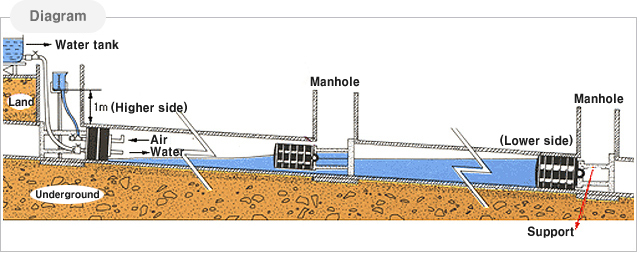
Watertight test procedure
1 test area should be between manholes. Clean the inside of the conduit before testing, keep the ground water level lower than the bottom of the conduit. Leak test procedure is as follows:
Step 1
Plug a stopper that can stand against the total pressure at the lower end of the conduit or if needed, at the underground pipe.
Step 2
Install similar stopper or supporting wood at the upper end and make sure to keep a hose or a vertical pipe stand.
Step 3
Fill water in to avoid generating bubbles.
Step 4
Fill water in the vertical test tube up to the required level.
Step 5
Leave it at least for 30 min. until the preventive conduit line for submerged lower area is saturated.
Step 6
Fill water in to keep the head at 1.0m and measure water amount required to maintain the head of the vertical test tube at 1.0m, for over 10 min.
Watertight test demonstration